Thursday, April 30, 2020

All about Layering 2

Hello everybody!
Lately I´ve been really focused on my classes at Altenew Academy to complete the first level of my certification (AECP). Being in quarantine has given me more time to work on my crafts, so I´ll stick to that to keep a positive focus on all these crazy times. I really hope everybody is doing whatever possible to avoid spreading the virus. But enough of that, I´m not here to talk about that.
¡Hola todos!
Últimamente me he centrado mucho en mis clases en Altenew Academy para completar el primer nivel de mi certificación (AECP). Estar en cuarentena me ha dado más tiempo para trabajar en mis manualidades, así que me centraré en eso para mantener un enfoque positivo en estos tiempos locos. Realmente espero que todos estén haciendo todo lo posible para evitar la propagación del virus. Pero ya, no estoy aquí para hablar de eso.
My cards today are made for “All about Layering 2” class, this is a free class Altenew offers. The lessons are a great way to get to know the stamp sets, the main idea is to show how to layer them, however I think they are the best way to decide if you want to get a certain set and to spark your creativity by looking at the pretty images the layers form. 
Mis tarjetas de hoy están hechas para la clase "All about Layering 2", esta es una clase gratuita que Altenew ofrece. Las lecciones son una excelente manera de conocer los sets de sellos, la idea principal es mostrar cómo colocarlos para ir poniendo las capas, sin embargo, creo que son la mejor manera de decidir si quieres comprar un determinado set y despertar la creatividad con las bonitas imágenes se forman.
 
The class is led by Nicole Picadura and she does a great job at explaining how to work with each set. In most lessons I realized how the beautiful images could be on their own on a card, there aren´t many more details needed to make a nice project. So, this is what I like the most about this class, stamping a couple of layers on a couple of images and voilà, the card is almost done!
La clase está dirigida por Nicole Picadura y ella hace un gran trabajo al explicar cómo trabajar con cada set. En la mayoría de las lecciones me di cuenta de que las bellas imágenes podrían estar solas en una tarjeta, no se necesitan muchos más detalles para hacer un buen proyecto. Entonces, esto es lo que más me gusta de esta clase: sellar un par de capas en un par de imágenes y listo, ¡la tarjeta está casi lista!
 

The protagonist of my cards today is the “Beautiful Day” stamp set. As I said before, I only needed to stamp the layers and the work was mostly done. To make the cards I started by playing with the stamp set, ink colors and card stock. I decided to go with blue for the flowers, I used the Altenew mini cube set: “Sweet Dreams”. For the leaves I used a mixture of blues and greens (Green Valley Mini Cube set).
El protagonista de mis tarjetas hoy es el set de sellos "Beautiful Day". Como dije antes, solo necesitaba estampar las capas y el trabajo ya estaba hecho. Para hacer las tarjetas, comencé jugando con los sellos, los colores de tinta y la cartulina. Decidí usar azul para las flores, utilicé el set de mini cubos  de tintas Altenew: "Sweet Dreams". Para las hojas utilicé una mezcla de azules y verdes (Green Valley Mini Cube).
 
After stamping many flowers and leaves I fuzzy cut them while watching TV, hahaha. Then I decided on the arrangement of my elements, using inspiration from the cards from the class. Some flowers are stuck with foam tape for dimension. 
Después de sellar muchas flores y hojas, las recorté mientras veía la televisión, jajaja. Luego decidí la disposición de mis elementos, usando un poco de la inspiración de las tarjetas de la clase. Algunas flores están pegadas con algo de dimensión, con goma eva.
 
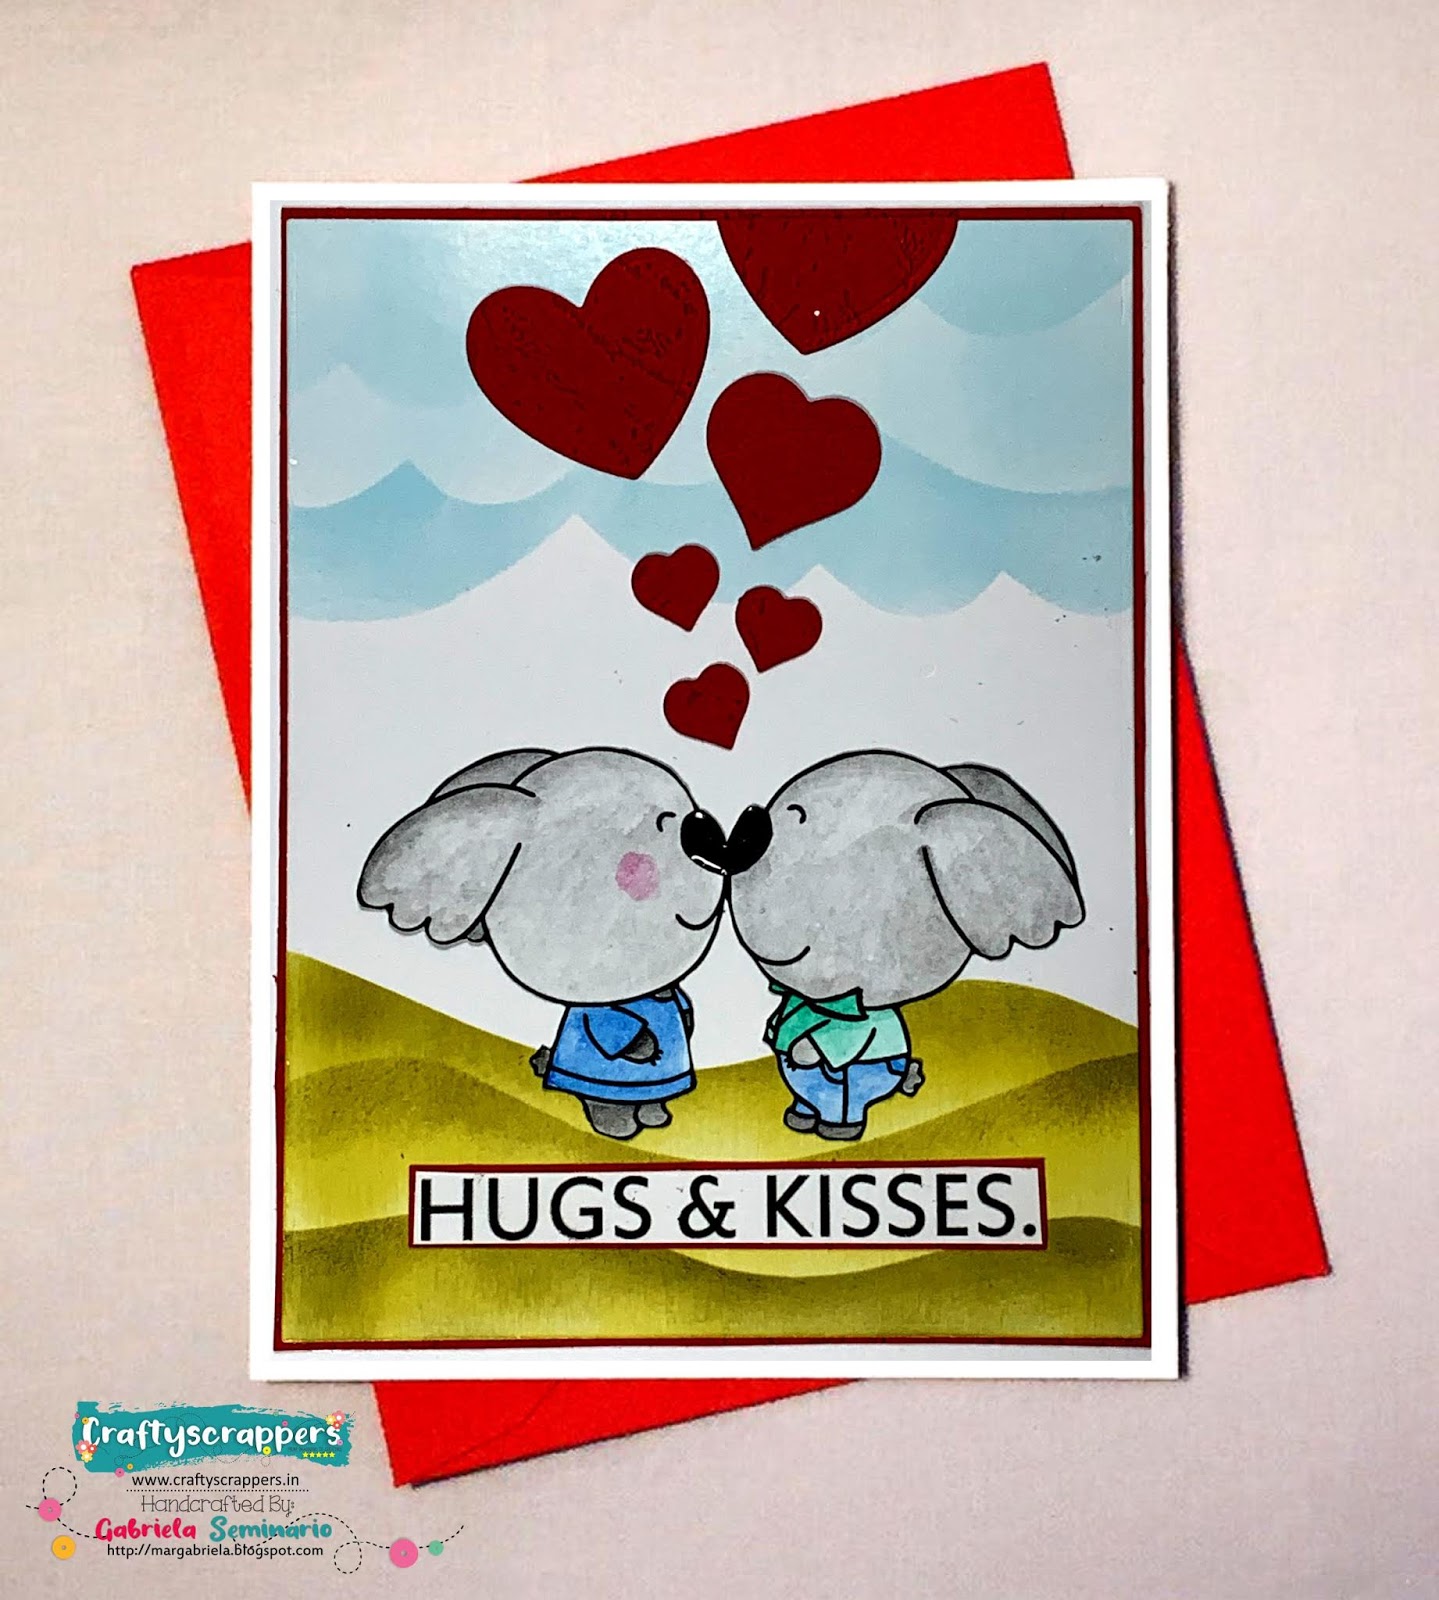
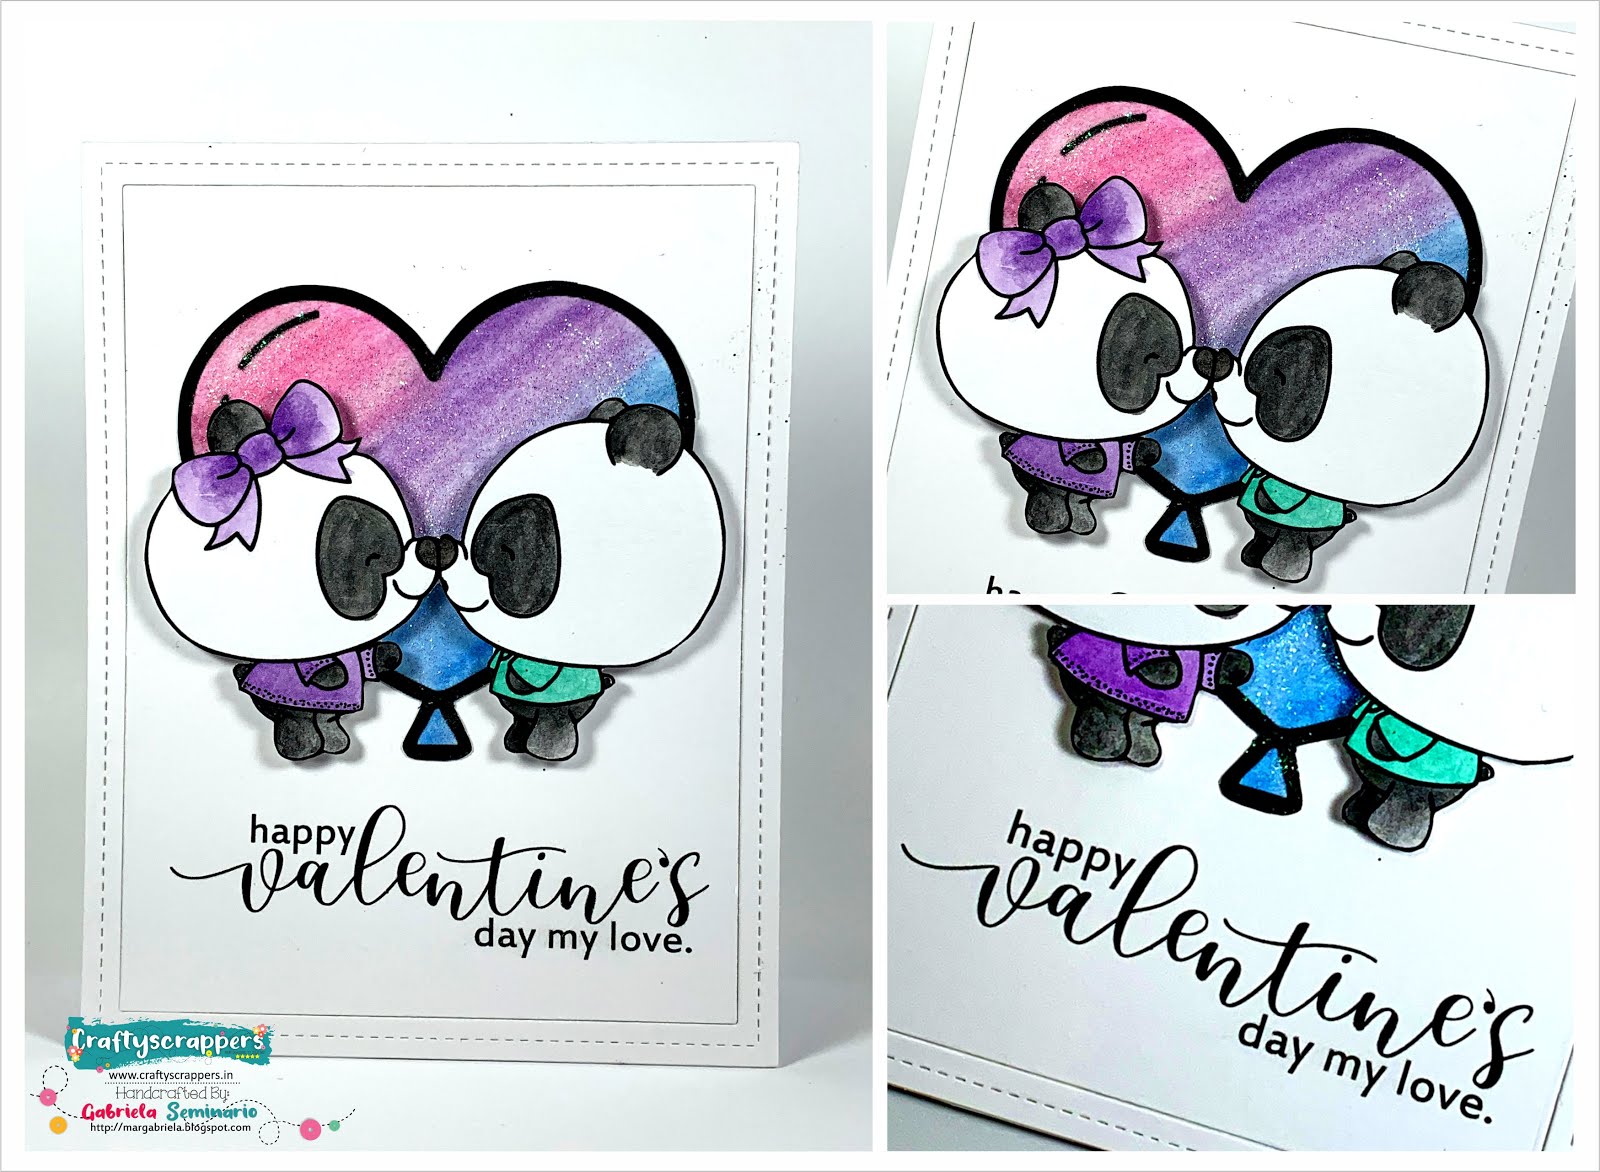
The sentiment is from the “Painted Butterflies” stamp set, AGAIN!!! Yes, again, I just love those sentiments. I stamped it with black ink it on a simple stripe of white card stock for the first card. And for the second card I die cut the word hugs from black glitter fun foam.
El mensaje es del set de sellos "Painted Butterflies", DE NUEVO! Sí, de nuevo, me encantan esos mensajes. Lo sellé con tinta negra en una simple franja de cartulina blanca para la primera tarjeta. Y para la segunda, usé troqueles para cortar la palabra HUGS de goma eva negra brillante.
 
I hope you like them and that I gave you some ideas, or at least I make you wanna go create something. Have a wonderful day!
Espero que te hayan gustado y que te haya dado algunas ideas, o al menos te haga querer ir a crear algo. ¡Qué tengas día genial!


Tuesday, April 21, 2020

All about layering 1

Hello everybody!
Today I bring another project I made to keep working with my certification with Altenew, AECP. They offer many classes at their website which are really nice, I have taken a few classes over last few years but now I decided to go with the full certification. They offer a few free classes if you would like to know how they are and see for yourself if this is something for you.
¡Hola a todos!
Hoy traigo otro proyecto que hice para seguir trabajando en mi certificación con Altenew, AECP. Ellos ofrecen muchas clases en su página web y son realmente agradables, he ido tomando algunas clases en los últimos años, pero ahora decidí ir por la certificación completa. Ofrecen algunas clases gratuitas si te interesa saber cómo son y ver si es algo para ti.
 
Today´s cards display my work for the “All About Layering 1” class, this class is one of the free classes they offer at Altenew Academy. It`s a class dedicated to show how to layer stamps, Altenew has a wide range of this “magical” stamps, I call them magical because I love seeing how the image gets better and better with each impression. If you haven’t seen this kind of stamps you should check them out.
Las tarjetas de hoy muestran mi trabajo para la clase "All About Layering 1", ésta es una de las clases gratuitas que ofrecen en Altenew Academy. Hay un "pequeño" detalle a considerar, y es que son clases en inglés. Es una clase dedicada a mostrar cómo superponer sellos, Altenew tiene una amplia gama de sellos "mágicos", los llamo mágicos porque me encanta ver cómo la imagen mejora y mejora con cada impresión de las capas que traen. Si no has visto este tipo de sellos, deberías hacerlo, quedan espectaculares.
 
I used the “Vintage Flowers” stamp set, I got my stamp positioner and played a lot to figure out the right position for each layer and to decide on the colors I wanted to use. I decided to use the “Cherry Blossoms” mini cube ink set, which are in the pink family.
After stamping many of the 2 bigger flowers from the set I fuzzy cut them. I really liked how they turned out but when I was assembling the card, I felt like I wanted to use more of the stamps for my cards. So remembered my previous card, where I repeated images with grey ink for the background and decided to do something similar.
Utilicé el set de sellos "Vintage Flowers", estuve “jugando” con mi posicionador de sellos para encontrar la posición correcta de cada capa y decidir los colores que quería usar. Decidí usar el set de tintas en mini cubos "Cherry Blossoms", que pertenecen a la familia del color rosa.
Después de sellar muchas flores con sus diferentes capas (las 2 flores más grandes de este set) las recorté con cuidado, dejando un borde pequeñito. Realmente me gustó cómo quedaron, pero cuando estaba tratando de armar la tarjeta, sentí que quería usar más sellos del set. Entonces recordé mi tarjeta anterior, donde repetí imágenes con tinta gris para el fondo y decidí hacer algo similar.
 
I stamped 2 panels with grey ink, on one I used the more solid images of the leaves and on the other the outlines of leaves and some flowers. Then I cut them out using a stitched frame die, the initial plan was to use the whole frame and inner part for a card, but I thought it could work if I split them into 2 cards. So, 2 cards have the frames and the other 2 have the inner portion.
Sellé las imágenes en 2 páneles con tinta gris, en uno usé las imágenes más sólidas de las hojas y en el otro los contornos de las hojas y algunas flores. Luego los corté usando un troquel de marco, el plan inicial era usar todo el marco y la parte interna para una tarjeta, pero pensé que podría funcionar si los dividía en 2 tarjetas. Entonces, 2 tarjetas tienen los marcos y las otras 2 tienen la porción interna.

The cards that use the frames needed a bit more love, so I stamped some leaves behind my main flowers, using the same grey ink on a white panel.
I white heat embossed some sentiments on silver cardstock, they are from the “Painted Butterflies” stamp set, I just love how clean and graphic they are. For each card, I adhered 2 flowers flat on the panel and the third one with a bit of foam tape. And the sentiment on top. I also added some shimmer to the flowers with a “Wink of Stella clear glitter brush pen”
Las tarjetas que usan los marcos necesitaban un poco más de cariño, así que sellé algunas hojas para simular que quedan detrás de las flores principales, usando la misma tinta gris en un panel blanco.
Los mensajes los hice con embossing blanco en cartulina plateada, son del set de sellos "Painted Burtterflies", me encanta lo limpios y gráficos que son. Para cada tarjeta, pegué 2 flores directamente en el panel y la tercera con un poco de goma eva. Y el mensaje encima. También agregué un poco de brillo a las flores con un “Wink of Stella clear glitter brush pen”
 
I hope you like them and that I gave you some ideas, or at least I make you wanna go create something. Have a wonderful day!
Espero que te hayan gustado y que te haya dado algunas ideas, o al menos te haga querer ir a crear algo. ¡Qué tengas día genial!


Wednesday, April 15, 2020

Clean and simple boutique cards

Hello everybody!
Today I bring another card I made to keep working with my certification with Altenew, AECP. They offer many classes at their website which are really nice, I have taken a few classes over last few years but now I decided to go with the full certification. They offer a few free classes if you would like to know how they are and see for yourself if this is something for you.
¡Hola a todos!
Hoy traigo otra tarjeta que hice para seguir trabajando en mi certificación con Altenew, AECP. Ellos ofrecen muchas clases en su página web y son realmente agradables, he ido tomando algunas clases en los últimos años, pero ahora decidí ir por la certificación completa. Ofrecen algunas clases gratuitas si te interesa saber cómo son y ver si es algo para ti.

On this opportunity I’m working with a class called Clean & Simple Boutique Cards, it’s guided by Jennifer Rzasa and I really like her classes, because she explains everything really detailed and with a calm way that makes me feel very confident when trying her ideas.
After working with several ideas that she gave during the class I decided to go with this one that uses repeated stamps on the card to make my own background, the focal point of this card is the background itself.
En esta oportunidad, estoy trabajando con una clase llamada Clean & Simple Boutique Cards, está dirigida por Jennifer Rzasa y realmente me gustan sus clases, porque ella explica todo muy detallado y con una forma tranquila que me hace sentir muy segura a la hora de probar sus ideas.
Después de trabajar con varias ideas que ella dio durante la clase, decidí optar por esta que usa imágenes repetidas en la tarjeta para crear mi propio fondo, el punto focal de esta tarjeta es el fondo en sí.

I decided to use the painted butterflies stamps set for this card. I got one of the silhouette stamps and stamp it several times on my background using grey ink, I wanted a subtle background, so that’s why I didn’t use black ink. I used a pencil to make some lines to guide me when I was stamping the butterflies and erased the lines when the ink was completely dry.
Decidí usar los sellos del set Painted Butterflies para esta tarjeta. Con uno de los sellos de silueta estampé varias veces en mi fondo con tinta gris, quería un fondo sutil, por eso no usé tinta negra. Utilicé un lápiz para hacer algunas líneas que me guiaran cuando iba sellando las mariposas y borré las líneas cuando la tinta estaba completamente seca.

Then I did some water colouring with Altenew inks. I did a very loose colouring; some butterflies have light pink and a little bit darker pink. I also coloured another butterfly with the darker pink and cut it out to use as an accent next to my sentiment, I’ve stamped this butterfly with black ink because I wanted it to stand out more.
Luego pinté un poco con tintas Altenew como si fueran acuarelas. Las pinté de manera muy holgada; Algunas mariposas tienen un rosa claro y otras un rosa un poco más oscuro. También pinté otra mariposa con el rosa más oscuro y la corté para usarla como un adorno al lado de mi mensaje. Esta mariposa la sellé con tinta negra porque quería que resaltara más.
For the sentiment I used ¨just saying hello¨ from the same stamp set. I cut it into a strip and added a black and white patterned paper strip underneath, but I wanted it to stand out a bit more from the background, so I watercoloured another strip of paper with the same pink ink so it will match the card. And finally, I foam mounted the sentiment and the butterfly to give it some dimension.
El mensaje, que lo saqué del mismo set de sellos, lo sellé con tinta negra. Lo corté en una tira y agregué un papel estampado en blanco y negro debajo, pero quería que sobresaliera un poco más del fondo, así que pinté tipo acuarela otra tira de papel con la misma tinta rosa para que todo combinara. Y finalmente, pegué el mensaje y la mariposa con un poco de goma eva por debajo para darles algo de dimensión.

I tend to work on more than one card when I sit down to create, so in this case I decided to do the same stamping on an off-white panel. I did the same steps but changing to orange.
Tiendo a trabajar en más de una tarjeta cuando me siento a crear, así que en este caso decidí hacer el mismo estampado en un panel color crema. Hice los mismos pasos pero cambié a color naranja.

I hope you like it and that I gave you some ideas, or at least I make you wanna go create something. Have a wonderful day!
Espero que te haya gustado y que te haya dado algunas ideas, o al menos te haga querer ir a crear algo. ¡Qué tengas día genial!


Wednesday, April 1, 2020

Faux watercolor card

Hello everyone!
Today I have another entry for my classes at Altenew for the Educator Certification Program (AECP). This time is for the Easy Ink Blending Techniques class. It was very hard to choose my project as all lessons had amazing techniques with lovely results.
¡Hola a todos!
Hoy tengo otra entrada para mis clases en Altenew para su Programa de Certificación de Educadores (AECP). Esta vez es para la clase Easy Ink Blending Techniques. Fue muy difícil elegir mi proyecto, ya que todas las lecciones tenían técnicas increíbles con excelentes resultados. Cada una más bonita que la otra.


The class is led by Amy Lee and she shows a variety of techniques to use ink blending to make beautiful projects. I really enjoyed her videos and she made want to create many cards for each lesson.
La clase está dirigida por Amy Lee y muestra varias de técnicas para usar la mezcla de tinta para hacer hermosos proyectos. Realmente disfruté sus videos y me hizo querer crear muchas tarjetas para cada lección.


At the end I decided to use her faux watercolor technique, where she does some ink blending and on top adds more ink to give the effect of watercolor. I loved the vibrant colors she used so I went with the same vibe. I used some Altenew inks to blend them on top my heat embossed flowers using an ink blending tool. The flowers and sentiments are from the Altenew stamp set Adore You.
Al final decidí usar su técnica de falsa acuarela, donde hace un poco de mezcla de tinta y encima agrega más tinta para dar el efecto de acuarela. Me encantaron los colores vibrantes que usó, así que seguí esa misma idea. Utilicé tintas Altenew para mezclarlas por encima de mis flores que había sellado con heat embossing blanco.Las flores y los mensajes son del set de sellos Altenew Adore You.

When I was happy with the blending I painted the flowers using the same ink to give a more intense tone, making it a bit loose. Then I added some splatters using the same inks watered down and a brush, I also added some black splatter as I wanted to tie in with the black sentiment strip.
Cuando ya estaba contenta con la mezcla de tintas, pinté las flores con la misma tinta y un poco de agua para dar un tono más intenso, haciéndolo un poco relajado. Luego agregué algunas salpicaduras con las mismas tintas con agua y un pincel, también agregué algunas salpicaduras negras ya que quería unificarlo con la tira negra del mensaje.

I hope you like them and that I have given you some inspiration or ideas.
Have a wonderful day!
Espero que te hayan gustado y que te haya dado alguna inspiración o idea.
¡Que tengas un día maravilloso!

Monday, March 16, 2020

Shiny cards

Hello everyone!
Today I bring a couple of cards I created for one of my Altenew online classes, Let it Shine. I’ve taken this class a while ago but I’m retaking it in order to complete all classes required for the Altenew Educator Certification Program (AECP).
Click here if you want to see to one of the cards I made for this class (around 4 years ago...)
¡Hola a todos!
Hoy traigo un par de tarjetas que creé para una de mis clases online de Altenew, Let it Shine. Tomé esta clase hace tiempo pero la estoy volviendo a hacer para completar todas las clases requeridas para el Programa de Certificación de Educadores de Altenew (AECP).
Puedes hacer click aquí si quieres ver una de las tarjetas que hice para esta clase, hace unos 4 años...

This class is led by Carissa Wiley, I have been following her for a while and I really love her style and her videos, so I’m happy to retake the class.
I ended up making two cards, I usually make multiple cards, but in this case I made the second one using the leftovers.
Esta clase está dirigida por Carissa Wiley, la vengo siguiendo desde hace tiempo y realmente me encanta su estilo y sus videos, así que estoy feliz de volver a tomar la clase.
Terminé haciendo dos tarjetas, generalmente hago varias tarjetas, pero en este caso hice la segunda usando las sobras.

One of my favourite techniques from the class is using vellum to heat emboss the images, so the shiny part of my first card comes from the gold embossing powder. I used it to heat emboss the flowers and leaves, from the “Adore You” Altenew stamp set, the sentiment and the strip on the side. I fuzzy cut the images and then adhered them with liquid glue only in a few areas so they have some dimension. I copied Carissa´s style with the grouping of banners on the right side, at first I wasn’t sure about but then I was happy with the result.
Una de mis técnicas favoritas de la clase es usar papel cebolla para sellar con polvos de embossing, la parte brillante de mi primera es del polvo de embossing dorado. Lo usé para las flores y las hojas, del set de sellos Altenew "Adore You", el mensaje y la tira a un lado. Corté las imágenes con tijeras y luego las pegué con pegamento líquido solo en algunas áreas para que tengan algo de dimensión. Copié el estilo de Carissa con la agrupación de tiras en el lado derecho, al principio no estaba segura pero al final me encantó el resultado.


For the second card I kept the same composition, but this time the flowers are stamped directly on my front panel with black ink, and for the shiny element I added some clear glitter paste on the flowers using a small brush.
Para la segunda tarjeta, mantuve la misma composición, pero esta vez las flores están selladas directamente en mi panel frontal con tinta negra, y para el elemento brillante agregué un poco de pasta de brillo transparente en las flores con un pincel pequeño.

This class is all about shiny stuff on our cards, any kind! I think in my projects I combined techniques and ideas from different lessons. I really like these cards…and I have some more leftovers on my desk, so I’ll be making more of this style.
¡Esta clase tiene que ver con cosas brillantes en nuestras tarjetas, de cualquier tipo! Creo que en mis proyectos combiné técnicas e ideas de diferentes lecciones. Realmente me gusta como quedaron ... y tengo más sobras en mi escritorio, así que haré más de este estilo.

I hope you like them and that I have given you some inspiration or ideas.
Have a wonderful day!
Espero que te hayan gustado y que te haya dado alguna inspiración o idea.

¡Que tengas un día maravilloso!

Sunday, March 1, 2020

Love cards with Craftyscrappers

Hi there!
Today I'll share all the cards I made for the month of February for Craftyscrappers.
The digital stamp set is really cute, with critters love!!! So cute!
¡Hola!
Hoy compartiré todas las tarjetas que hice para el mes de febrero para Craftyscrappers.
¡El set de sellos digitales es realmente lindo, con amor de animalitos! ¡Muy lindo!

These images forced me to create a bit out of my confort zone, so I'm really happy with the results.
Estas imágenes me obligaron a crear un poco fuera de mi zona de confort, así que estoy muy contenta con los resultados.


I had fun looking for different colors combinations, using watercolors and alcohol markers, and trying to come up with different designs. I'm not very experienced using digital sets, I think this has been a great creative exercise for my brain.
Me divertí buscando diferentes combinaciones de colores, usando acuarelas y marcadores de alcohol, y tratando de crear diferentes diseños. No tengo mucha experiencia en el uso de sets digitales, creo que ha sido un gran ejercicio creativo para mi cerebro.


I hope you like them and you felt all the looooove.
Espero que te gusten y que se sienta todo el amoooor de las tarjetas.


Saturday, February 15, 2020

Craftyscrappers design team member

Hello everyone!
Last year I applied to be a design member at Craftyscrappers. At the beginning of 2020 they replied saying I was accepted on the team. It made me really happy!!
I’ll be part of the team for 6 months, starting on February.
Each month I’ll be sharing projects with a digital stamp set.
¡Hola a todos!
El año pasado mandé una aplicación para ser miembro del equipo de diseño en Craftyscrappers. A principios de 2020 me respondieron diciendo que me habían aceptado en el equipo. ¡Qué emoción!
Seré parte del equipo durante 6 meses, comenzando en febrero.
Cada mes compartiré proyectos con sets de sellos digitales.

February’s projects are all about love, the stamp set is called Love Struck and it brings beautiful animals kissing and gorgeous sentiments.
Los proyectos de febrero tienen que ver con el amor, el set de sellos se llama Love Struck y trae lindos animales dándose un beso y hermosos mensajes.

So here is the first card I made. It was a bit of a challenge for me as I’m not used to digital stamps, the great thing is I can resize any image to whatever I want.
So I printed many images in different sizes to practice coloring with different media.
For this project I colored the pandas with watercolor pencils, sometimes I color straight on the paper and then apply some water with a water brush and sometimes I pick up some color from the tip of the pencil using the brush. Then I fuzzy cut the images.
I added some clear glitter paste on the heart and adhered the pandas with some fun foam behind them for dimension.
Así que aquí muestro la primera tarjeta que hice. Fue un desafío para mí, ya que no estoy acostumbrada a los sellos digitales, lo bueno es que puedo cambiar el tamaño de cualquier imagen a lo que quiera. Así que imprimí muchas imágenes en diferentes tamaños para practicar colorear con diferentes medios.
Para este proyecto, coloreé los pandas con lápices de acuarela, a veces coloreo directamente sobre el papel y luego aplico un poco de agua con un pincel de agua y a veces tomo un poco de color de la punta del lápiz con el pincel. Luego corté las imágenes. Agregué un poco de pasta de brillo transparente en el corazón y pegué los pandas con un poco de ego eva detrás para darles dimensión.

I hope you like them and that I have given you some inspiration or ideas.
Have a wonderful day!
Espero que te hayan gustado y que te haya dado alguna inspiración o idea.
¡Que tengas un día maravilloso!

Monday, November 25, 2019

Gabriela and her flowers Card/ Gabriela y sus flores, tarjeta


Hello everyone!
Today’s entry is a project with a beautiful stamp. I’ve been stamping it with different inks, markers, watercolor, I’ve been experimenting with paper and color. The stamp is so pretty that I had fun mixing and trying a few techniques. 
¡Hola a todos!
La entrada de hoy es un proyecto con un hermoso sello. Lo he estado utilizando con diferentes tintas, marcadores, acuarela, he estado experimentando con papeles y colores. El sello es tan bonito que me divertí mezclando y probando varias técnicas.

I made a set of 4 cards using a different color of embossing powder for each one. 
Hice un conjunto de 4 tarjetas con un color diferente de polvo de embossing para cada una.


I prepared my watercolor paper for heat embossing, which requires an antistatic powder tool to prevent the powder from sticking to unwanted areas.
Then I inked the stamp with versamark Ink and stamp it. I used a stamp positioner so I could inked it twice, because watercolor paper has a bit of a texture and sometimes stamping it once doesn’t give the best impression.
Preparé mi papel de acuarela para el embossing, que requiere una herramienta de polvo antiestático para evitar que el polvo se adhiera a áreas no deseadas.
Luego entinté el sello con versamark Ink y lo sellé. Utilicé un posicionador de sellos para poder sellarlo dos veces, porque el papel de acuarela tiene un poco de textura y, a veces, estamparlo una vez no da la mejor impresión.

Then added the embossing powder and used a dry brush to get rid of any stray powder.
Then I let my heat tool warm up for a few seconds and melted the powder moving the heating tool around and on both sides of the paper to minimise warping. I love this step, it’s like magic seeing that powder melt and becoming a beautiful image. 
I did the same process for the sentiments, I stamped several messages so I could pick the ones I liked the most, and also have some left over to use on other projects. I like doing this because it saves time and paper.
Luego agregué el polvo de embossing y utilicé un pincel seco para eliminar cualquier polvo perdido por ahí.
Luego dejé que la herramienta de calor se calentara durante unos segundos y derretí el polvo moviendo la herramienta hacia ambos lados del papel para minimizar la deformación. Me encanta este paso, es como magia ver que el polvo se derrite y se convertir en una imagen hermosa y brillante.
Hice el mismo proceso para los mensajes, sellé varios mensajes para poder elegir los que más me gustaban y también para que me sobraran para usar en otros proyectos. Me gusta hacer esto porque ahorra tiempo y papel.


Then the fun part begins!!!! Smooshing color!!! On a slick surface I put on Distress Inks and sprayed some water then “smooch” my panels against the wet ink. I added a few layers. Then I got a brush and color with the same Distress Inks some parts of the stamped girl and flowers, specially flowers and leaves.
After everything was dried I die cut a frame and adhere the centre portion and the frame to a notecard.
¡Aquí comienza la parte divertida! Smooshing color! Sobre una superficie no porosa, puse tintas Distress, rocié un poco de agua y luego "smooch" mis paneles contra la tinta húmeda. Hice varias capas de esta manera. Luego con un pincel y las mismas tintas con agua pinté partes de la imagen, sobretodo flores y hojas.
Después que todo se secó, corté un marco y adhierí la parte central y el marco a una base de tarjeta.

In case you were wondering what I used, besides the Prima Marketing Stamp Gabrielle, here is a picture of the inks and other materials I used.
En caso que te interese saber qué materiales utilicé, ademas del sello de Prima Marketing Stamp Gabrielle, aquí muestro una foto donde se ven los colores de tinta que usé y algunos otros materiales.


It was really fun creating these cards and I already have fans woooohoooo.
Have a great day :)
Fue muy divertido crear estas tarjetas y ya tengo admiradores woooohoooo.
Que tengas un día genial :)