Showing posts with label birthday. Show all posts

Friday, February 10, 2017

Hello There, Party Invitation Cards- Tips for mass producing Video


Hello there!
That´s the sentiment for my party invitation cards: Hello there. Today I´m sharing a video of the process to mass produce cards, I made 24 invitation cards for my daughter´s party. Hopefully the video will give you some tips that save time when making many cards at a time and also get some ideas for a cute design.

Hello there!
Este es el mensaje de mis tarjetas de invitación: Hello There. Hoy estoy compartiendo un video del proceso para producir tarjetas en cantidades grandes, hice 24 tarjetas de invitación para la fiesta de mi hija. Espero que el video te dé algunos consejos que ahorrar tiempo al hacer muchas tarjetas a la vez y también algunas ideas para un lindo diseño.


 I wanted to include lots of techniques for this cards because I know my daughter´s friends would appreciate something very special. So I did some ink blending with a stencil, heat embossing, sewing, a little bit of vellum... I even decorated the envelopes and each card has their name printed on the inside.

Quería incluir diferentes técnicas en las tarjetas porque sé que las amigas de mi hija apreciarían algo tan especial. Así que hice un poco de "blending" de tinta con una plantilla, embossing de calor, costuras, un poco de papel cebolla... Hasta decoré los sobres y cada tarjeta tiene impreso el nombre de casa niña en el interior.


I hope you like it, have a nice day :)
Espero que te guste y que tengas un día fenomenal :)
SaveSave

Wednesday, October 19, 2016

Unicorn Birthday Card

 The project I'm sharing today is the card that I made for my niece who was turning six years old. I knew I had the perfect stamp set with this one that I got from Simon Says Stamp as a birthday present for me (the set is called: Magical Birthday), with a unicorn and a rainbow I knew it was a perfect match for a little girl, since she is not such a girly girl I decided to color the unicorn blue and green.
El proyecto que voy a compartir hoy es una tarjeta que hice para mi sobrina que estaba cumpliendo seis años. Sabía que tenía el set de sellos perfecto para el proyecto con éste que SimonSays Stamp me envió como regalo de cumpleaños para mí (el set se llama: Magical Birthday), con un unicornio y un arco iris sabía que era una combinación perfecta para una niña, pero como ella no es una chica de colores rosa decidí pintar el unicornio de azul y verde. 

I love making shaker cards and this was the perfect opportunity to make one, children love them! 
I started by stamping and heat embossing with silver embossing powder the unicorn and the rainbow, I stamped the images twice just in case I made a mistake but they both came out well so I ended up making two cards. 
Me encanta hacer tarjetas “Shaker” y esta era la oportunidad perfecta para hacer una porque a los niños les encanta.
Empecé por sellar y poner porlvo plateado de embossing para el unicornio y el arco iris, estampé las imágenes dos veces por si acaso me equivocaba, pero ambas salieron bien, así que acabé haciendo dos tarjetas.
 I painted the images with watercolor pencils and a paint brush, and after they were dried I added some wink of Stella are clear brush pen, they look really shimmery and sparkly when they catch the light.
The only difference between the cards is the hills that I cut out of some scrap patterned paper. 
Pinté las imágenes con lápices de acuarela y un pincel, y después de que se secaron añadí un poco de wink of Stella are clear brush pen, se ven muy relucientes y brillantes cuando les da la luz.
La única diferencia entre las tarjetas son las Colinas, que las corté de restos de papel estampado que tenía por ahí.

 The sentiment is also from the same stamp set and I mixed a little bit of colors, I did part of the sentiment with black distress ink and then added some clear embossing powder; the happy birthday part I did it with the same silver embossing powder I used for the images.
El mensaje también es del mismo conjunto de sellos, mezclé un poco de colores, hice parte del mensaje con tinta negra Distress y luego le puse un poco de polvo de embossing transparente; la parte de “happy birthday” lo hice con el mismo polvo plateado que utilicé para las imágenes.
 I'm really happy with the results and even more with my niece's face when she saw the card and started shaking it, and the best part is that now she's into unicorns and I didn't even know about it, that gave me extra credits ;)
Estoy muy contenta con los resultados y más aún con la cara de mi sobrina cuando vio la tarjeta y comenzó a moverla, y la mejor parte es que ahora ella está en la etapa que le encantan los unicornios y yo ni siquiera lo sabía, así que gané más puntos ;)
Have a great day!
¡Que tengas un día maravilloso!
SaveSave

Thursday, February 4, 2016

Class: Watercolor for cardmakers: intermediate techniques

I decided to take another online class with Online Card Classes, I love those ladies and I could´t resist  taking another watercolor one. I have to admit this is by far the best class I´ve taken with them, the quality and amount of information, ideas and inspiration are excellent.
It´s an intensive class as there was one week full of lessons, so I have been able to play along with my round of practice, but I haven´t been able to put together too many cards.
I finished the first two cards from the very first lessons, where the idea was to experiment with the materials we have, paints, brushes and the most important one: paper.
Me decidí a tomar otra clase online con las chicas de Online Card Classes, me encantan esas chicas y no me pude resistir a esta nueva clase de acuarelas. Y tengo que confesarles que es la mejor clase que he tomado con ellas, la calidad y cantidad de información e ideas es excelente.
Es una clase intensiva porque en una sola semana tuvimos un montón de lecciones, así que he ido practicando poco a poco pero no he tenido tiempo de finalizar muchas tarjetas.
Pude terminar las de las primeras lecciones, donde estábamos en etapa de experimentar con los materiales que tenemos, acuarelas, pinceles y sobretodo el papel.


On the first card we had to create a background using a simple shape repeatedly, experimenting with colors and water-pigment ratios. To assemble the card I stamped a sentiment on a patterned paper with a subtle pattern so it it wouldn't be too distracting, cut it into a rectangle and then I layered it on some hand torn vallum paper.
Para la primera tarjeta teníamos que crear un fondo pintando una figura simple repetidamente, experimentando con los colores y proporciones de agua y pigmento. Para montar la tarjeta sellé el mensaje en un papel decorado con un dibujo sencillo para que no fuera un distractor, lo corté en forma de rectángulo y lo coloqué encima de un pedazo de papel cebolla rasgado a mano.


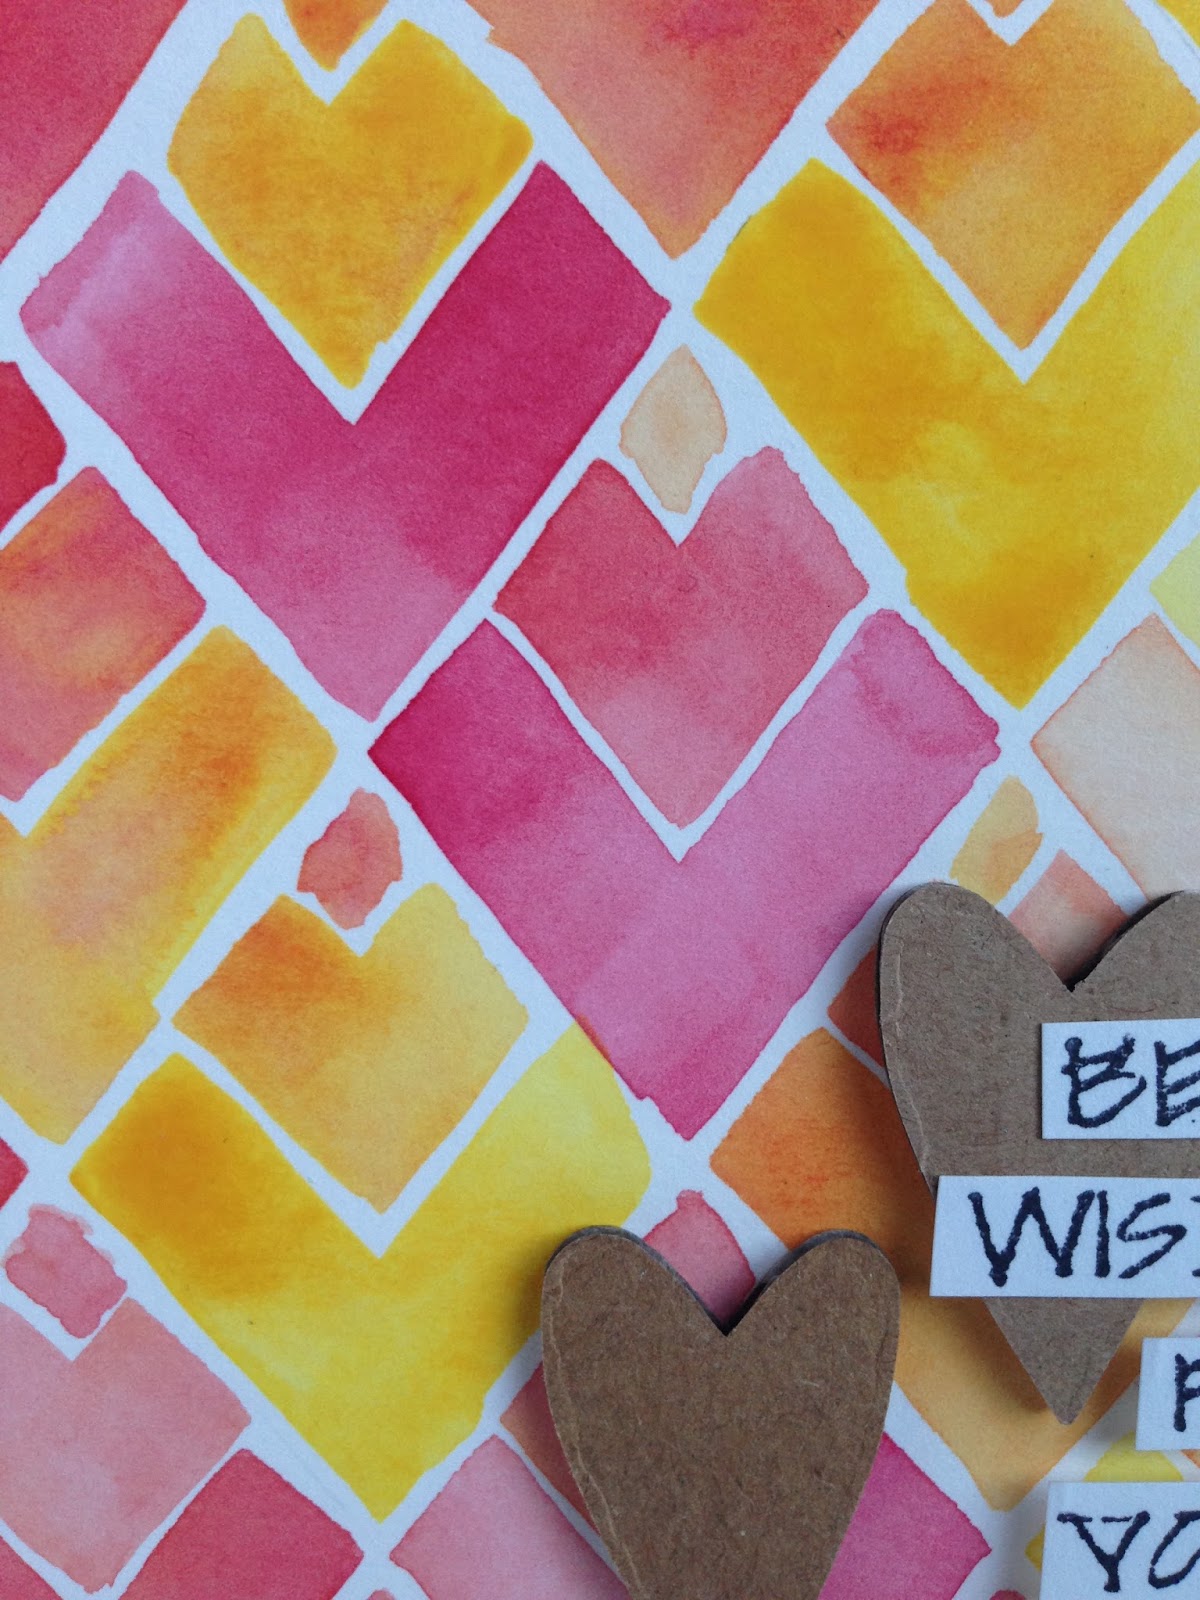
For the second card we were supposed to experiment with a flat brush and take advantage of its shape to make a background with a geometric pattern.  I quickly put together a card as I liked the result of my colourful background. I added some cardboard hearts and a sentiment from a Tim Holtz stamp.
En el segundo proyecto teníamos que experimentar con un pincel plano y aprovechar su forma para hacer un fondo con figuras geométricas. Como me gustó mucho el resultado rápidamente armé la tarje agregando unos corazones de cartón y un mensaje de un sello de Tim Holtz. 

I hope you like it!
¡Espero que te guste!

Monday, February 1, 2016

Watercolor Birthday card: Mika 5

This is a card I made for my niece. She is obsessed with giraffes, so when I so this cute giraffe I wanted to use it on her card. It´s a digital image from The Paper Shelter.
Esta es una tarjeta que hice para mi sobrina. Está obsesionada con las jirafas, así que cuando vi esta imagen la quise usar en su tarjeta. Es una imagen digital de The Paper Shelter.
I colored it using distress markers.
Utilicé los rotuladores Distress para colorearla. 

I hope you like it.
Espero que te guste.

Friday, October 2, 2015

Have a monster birthday cards


I made two more cards using Create a Smile freebies. I started with the bird and now the monster! The sentiment is also from them. You can see the bird cards I made here.
Hice dos tarjetas más utilizando imágenes gratis de Create a Smile. El mensaje también es un freebie de ellos. ¡Comencé con los pajaritos y ahora los monstruos! Puedes ver las tarjetas que hice con los pajaritos aquí. 
After watercoloring the monsters with watercolor pencils I used masking fluid to cover the monster. I wanted a good mask so I could color the background easily.
Luego de colorear los monstruos con lápices de acuarela utilicé líquido de enmascarar para cubrirlos. Quería una buena cobertura para colorear los fondos más fácilmente.
I had fun creating these cards...now my kiddos want to give it a try.
Me divertí un montón haciendo estas tarjetas...ahora mis peques quieren intentarlo.
I´m submitting these cards for a DT call.
Estoy presentando estas tarjetas para un llamado al Equipo de Diseñadores.


I hope you like it ;)
Espero que les guste ;)

Friday, September 11, 2015

Happy Birthday Card, challenge

This is my creation for Simon Says Stamp Monday Challenge, this week the theme is Stamp and punch/die cut. 
Esta es mu creación para el reto de los lunes de Simon Says Stamp, esta semana el tema es sellar y troquelar.
I stamped this zig zag background with distress inks using a Simon Says Stamp set called ¨very special¨. After I stamped the whole background I sprayed a bit go water to get the ink moving a bit. And the Happy Birthday spam is from another set called ¨more sketchy banner greetings¨
Para hacer el fondo sellé varias veces con un sello de zig zag de Simon Says Stamp llamado ¨very special¨ Luego de haber estampado todo el fondo pulvericé un poco de agua para cativar la tinta y que se moviera un poco. Y el sello del mensaje de la tarjeta también es de Simon Says Stamp de un set llamado ¨more sketchy banner greetings¨

For the die cutting part of the stamp I used a Sizzix die to cut out this fancy frame, and I also die cut a heart with the extra pieces of the background I created initially. I embossed the border with a Lawn fawn die called stitched borders, just to add a finishing touch.
Para la parte de troquelado del reto utilicé un troquel de Sizzix para cortar este lindo marco, y también troquelé un corazón con lo que sobraba del panel que había creado. Luego le hice un grabado en el borde de la tarjeta con un troquel de Lawn fawn llamado stitched borders, para agregarle el toque final.
I hope you like it ;)
Espero que les guste ;)

Wednesday, April 8, 2015

Paper scraps b-day card


I needed to make a quick birthday card, so what better way that taking advantage of all this cute-beautiful-gorgeous patterned paper left overs. The papers did all the job for me. I die cut the banner with the Simon Says Stamp die and embossed the sentiment from the same set.
I’m thinking I should make a ton of this card as I keep running out of cards to give and I would make a good use of my scraps.


Necesitaba hacer una tarjeta de cumpleaños rápidamente, y qué mejor manera que aprovechar todos los restos de papel con diseño que son lindos-hermosos-preciosos. Los papeles hicieron todo el trabajo por mí. Utilicé troqueles y sellos de Simon Says Stamp para el mensaje de la tarjeta. Estoy pensando que debería hacer una tonelada de esta tarjeta, porque siempre me quedo sin tarjetas para regalar y me gustaría hacer un buen uso de mis restos de papeles.


Saturday, May 17, 2014

Card: Enjoy your special day

I needed to make a card for my mother in law, so we could send it on time for her birthday.
I started with a craft card stock cut to a standard A2 size card. I masked the borders with masking tape. Then I stamped a scene of flowers and leaves using a very old stamp set (Buzz and Bloom 2006 65) and Doodle Flowers by Inkadinkado, with Staz-on black ink.
Tenía que hacer una tarjeta para mi suegra, para poder enviarla a tiempo para su cumpleaños. 
Empecé con una cartulina craft cortada para hacer una tarjeta de tamaño estándar A2. Cubrí los bordes con cinta de pintor. Luego sellé una escena de flores y hojas usando un set de sellos muy viejo (Buzz y Bloom 2006 65) y  Doodle Flowers por Inkadinkado, con tinta negra Staz-on.
 Then I chose some pattern papers from the August 2012 Simon Says Stamp Card kit and stamped some of the same flowers I stamped on my card base, I wanted to do some paper piecing.
Después elegí unos papeles decorados del kit the tarjetas de Simon Says Stamp, August 2012 y sellé algunas de las mismas flores que puse en la base de mi tarjeta, quería hacer "paper piecing".
 I die cut some leaves using a new die I bought in the Nethelands, it's from Craftables.
I stuck some of the flowers flat on the card.
Corté unas hojas con un troquel nuevo que compré hace poco en Holanda, es de Craftables. 
Pegué algunas flores planas en la tarjeta.
 I used foam take to pop up 3 of my main flowers.
Utilicé adhesivo de foamy para darle altura a las 3 flores principales.
I stamped the sentiment and cut it out like a tag and attached it with some string. The sentiment is from Bo Bonny and the set it's called Sentiment Stamps.
I added a white frame, it came in one of the Ikea small picture frames and I didn't use it, I kept it because I knew this passepartout would be handy at some point. I let some elements hang out of the frame to give it more interest.
Sellé el mensaje de la tarjeta y lo corté como si fuera una etiqueta y lo pegué con un poco de cuerda. El sello es de Bo Bonny y el conjunto se llama Sentiment Stamps. 
He añadido un marco blanco, venía en uno de los marcos pequeños de Ikea y no lo usé, lo guardé porque sabía que este passepartout sería útil en algún momento. Dejé que algunos elementos salieran sobre el marco para darle más interés.
 And here is the result.
Y aquí está el resultado.
 We managed to sent it to my mother in law on time, well....it got there a couple if days late :(
Casi logramos que le llegara a tiempo a mi suegra...bueno, con un par de días de retraso :(
I hope you like it ;)
Espero que les guste ;)

Wednesday, April 9, 2014

40th bday Card

I made this card for my hubby's 40th birthday. I'll see him tomorrow and finally we"ll be able to celebrate his big (not too big) 40th birthday ;)
I'm loving all these watercolors techniques.
I saw this "quote" on pinterest and wanted to use it on my card. I hand-wrote the sentiment because I wanted a very distressed look. I white heat embossed the letters then I wet the area where I wanted the colors and added the watercolor overlapping them a bit.
Hice esta tarjeta para el cumpleaños 40 de mi marido. Lo voy a ver mañana y por fin podremos celebrar su gran (no tan grande) cumpleaños número 40 ;)
Estoy enganchada a todas estas técnicas de acuarelas. 
Encontré esta "cita" en Pinterest y quería usarla en mi tarjeta. Escribí a mano el mensaje porque quería mostrar un estilo casual. Hice embossing blanco para las letras y luego mojé la zona donde quería los colores, y comencé a agregar las acuarelas, superponiendo los colores un poco.